


To see if this custom-fit item will work for you please tell us what vehicle you'll use it with.



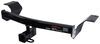
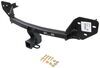
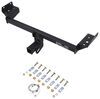
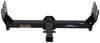
You don’t have to give up your vehicle’s clean look to carry bikes or extra gear. This hitch hides behind the bumper with the cross tube fully concealed. The 2" receiver detaches without tools, leaving no visible hardware when it’s removed. When you’re ready to load up, the receiver pops back into place and locks in securely for hauling your bike rack or cargo carrier.

This setup uses a strong stainless steel center block that mounts solidly under the bumper. The block lets the receiver lock in tight for a stable, rattle-free fit. Stainless steel construction resists corrosion and pairs with a black powder coat finish for long-term durability. With a maximum tongue weight of 350 lbs, it provides dependable support for hitch-mounted racks and carriers.

Attaching or removing the receiver takes only a few seconds. Push it into the center block until it automatically latches—no tools needed. Press the built-in lock to secure it, and when you’re done hauling, unlock and twist the handle to release. A hitch plug covers the opening when not in use, keeping dirt and debris out so it’s always ready for your next trip.

 Alternate Instructions
Videos are provided as a guide only. Refer to manufacturer installation instructions and specs for complete information.
Hi, this is Scott with etrailer, and today, we're taking a look at and installing our Stealth Hitch on our 2026 Mercedes-Benz GLC. Our Stealth Hitch we have on our GLC today is gonna be an excellent option for people that wanna maintain that factory appearance without having a hitch hanging down all the time. So, say you wanna haul around your bike rack with some bikes on it and maybe a cargo carrier with some extra gear on it. This is gonna be an excellent hitch for you. Now, say you're not using it all the time, so you can just hide away your receiver portion of your hitch itself. When you're not using it, you can just tuck this away.
Now, say you wanna put your bike rack on the back, all you're gonna have to do is just pop in your receiver. Go ahead and push that up, and that's gonna click in place. Just give it a nice little push up. Now it's all locked in. Now, say you leave your receiver on once in a while.
There's also a key here on the side. You're gonna have a tumbler, and you can actually lock your receiver on so nobody can take that off while you're away from your vehicle. Now, this is gonna have a tow weight rating of 350 pounds, and that's gonna be the weight of your bike racks or your cargo carriers loaded down with all of your gear pushing down on the lower section of the receiver itself. This hitch is gonna have a 5/8 pinhole opening. That's gonna hold in any of your accessories that you put in the back.
Now, this won't come with a pin and clip, but keep in mind, you can always pick one up here at etrailer. But a lot of your accessories now, like your bike racks or your cargo carriers, will come with an anti-rattle pin. As far as measurements go for this hitch, from the center of our pinhole out to the edge of our bumper, our pinhole is actually just out past the edge of that, so you shouldn't have any problems with any of your accessories that fold up or stow away making any contact with the back of your vehicle. Now, from the ground to the top inside edge of our receiver, we're looking at right at around 12 1/2 inches. Now, that measurement, you'll be able to decide on if you have any accessories that may need a little bit of lift to those, like a rise in the shank of your bike racks or cargo carriers for clearance.
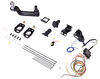
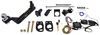
Now, if you have any questions or comments about this hitch for your Mercedes-Benz, you can always leave a question or comment down below in the comment section, or you can get a hold of one of our experts here at etrailer. They'd be glad to help you out. Now, as far as installation goes, this one really isn't too bad. It's definitely something you could handle yourself, but if you don't have the time or the tools or the place to do this one, you can always take a look at our installer locator and get something done for you locally. If it's something you feel like tackling yourself, stick around, watch our video, and we'll help you get it installed. To start our installation, we have our Mercedes-Benz up in the air a little bit. Now, you can do this down on the ground. We have ours up. Just makes it a little bit easier for you to see. So, now underneath of our fascia, we're gonna need to get some hardware removed, and we're gonna have four 10-millimeter bolts that go around our fascia we're gonna remove. (drill whirring) Colleague Yes. In the center of our fascia, we're gonna have this plastic rivet. I'm just gonna get under that with a flathead screwdriver, pull the center down, and we'll just get that pulled outta the way. I did apply some blue painter's tape to the back of our fascia here. That way, we don't have any scratches when we start removing this. So we're gonna be removing this lower portion, so what I wanna do is I'm gonna get behind here with a clip tool and just kinda start working this back. We're just gonna work from the edge and then start our way around. What we wanna do is kinda pull back on it a little bit and get in behind that, and we're just gonna pop that out. (fascia cracking) After we have that started, we're gonna start working our way across, pull with a little pressure, and just start pulling out on our panel. Now, in some places, it may hang up a little bit, so you may need to take a tool and stick it in behind there and just get that to pop out. Now, with an extra set of hands, it makes this a little bit easier. They'll be able to hold this for you and kinda help give a little pressure. Pull it back on our panel. After we get that so far out, we are gonna have some little clips back here that just push onto these tabs, and those just hold our wiring harness. We'll remove those, and then we can set our panel aside. We are gonna have another wire that comes down, and that's gonna lead to our kick sensor. Again, we're gonna have these little push-on clips, just pop those up, pull back on this little tab, push down on our tab, then we can let that wire just hang there. And we'll take our fascia and set it aside. We are gonna need to remove our back exhaust hangers back here on the back. So what I wanna do is just support my exhaust with a cam buckle strap. I'm just gonna find a good, solid spot for me to put my hoops, and we'll pull our strap tight. For our exhaust hangers, we are gonna have the star-type bolts. Now, I don't have the specialty bit for that, but I did find that my 10 millimeter just barely fits, so I'm gonna carefully break that loose. (drill whirring) For our next step, we need to get our bumper beam out of the way, and we're going to have four 18-millimeter nuts that are holding on our bumper beam. I'm gonna go ahead and take a socket, and we'll get those removed. (socket whirring) Once we get down to the last nut, you wanna make sure that you're holding your bumper beam up so it doesn't just fall off. (socket whirring) With the last nut removed, we'll just pull back on our bumper beam. Now, we'll set that aside. Now, depending on what model you have, on ours, we're gonna have this pedestrian alert speaker here. We need to get this outta the way so we have room for our hitch. So what I'll do is I'll take out these three 10-millimeter nuts. (drill whirring) That way, I can remove the whole bracket and the speaker, (drill whirring) and I'll find a place to relocate this. Now, in our kit, we're gonna have these replacement brackets. What these are gonna be for is they're gonna replace our exhaust hangers. They're gonna go on our hitch. In our instructions, it shows our tapered side is gonna be towards the outside of our vehicle, so we're gonna have both of those tapering in this fashion, so make sure you orientate this that way. That way, your bolt holes for your exhaust hangers line up. So what I'll do now is I'll just keep my factory nuts close to me, and we'll get our hitch lifted up into position. Now, I'll lift this up and set this over our factory studs, and I'll go ahead and start our top factory nuts on each side. Let's run them down, finger tight, and that's gonna hold our hitch in place so we can get everything else put in place. Now we'll just orientate our bracket over our lower studs. And again, we'll start on our factory nuts and just get those run down, finger-tight on both sides. With all of our hardware in place, what we like to do is make sure that our hitch is centered up in the back of our Mercedes. After we've done that, we'll come back through, and we'll take an 18-millimeter socket, and I just wanna get our hardware snug. (socket whirring) After we have all of our hardware in place and our brackets look nice and level, we'll come back through with our torque wrench, and then we'll torque down all of our hardware to the specifications listed in our instruction manual. (torque wrench clicking) (torque wrench beeps) Now, when you go and torque these bottom nuts, what I noticed, especially on the other side, is this bracket will wanna try and rotate with our factory nut, so what you can do to kinda prevent that is, in your kit, you're gonna have your bolt and your washer and a flange nut. So what you can do is just go ahead and run that down through and get your hardware in place before your next step. And just run the nut up, finger tight, and that's gonna keep your bracket from rotating when you torque that down. With a half-inch wrench and a half-inch socket, we'll go ahead and tighten down our hardware for our exhaust hangers. Now, in order to mount our speaker up outta the way, I did find out that if I mount it to this little access hole right here, that is gonna keep it outta the way of my fascia and everything else. So what I did is I had some extra hardware laying around, I'm just gonna use a bolt that will go through my mount, I'm gonna run that through, and I have a larger fender washer I'll put on the back, followed up by a lock nut. Now I'll just go ahead and tighten down my hardware. (drill whirring) Now we can install our lock assembly. With that, we just took our hardware off of it. Now I'm gonna run my bolts through the side that we have our handle, run that through our hitch frame, and the same with our other bolt. Now we'll just install our nyloc nuts. Now we'll just snug down our hardware. I'll be using a 15/16 socket and wrench. (wrench clicking) Now we'll torque down our two bolts to the specifications listed in our instruction manual. (torque wrench clicking) (torque wrench beeps) We're gonna have this rubber plug on the bottom of our receiver, and inside, you'll have your keys. For our next step, we need to get our fascia trimmed out. So what we did is we went ahead and took our measurements that they have in our instruction manual, and we just marked everything all out with our paint pen. And now, I'll come back through with my multi-tool cutter, and we'll get this all cut out. (cutter whirring) Now, after we've made our cut, we can come back through and clean up our edges. We can either take a file or a utility knife, and sometimes just using your fingers to take off the plastic that rolled off is just as easy. With everything torqued down and our fascia all cut out, what I'll do now is we'll come back through, and we'll get our fascia put back in place. When you do that, just make sure you plug in any of your electronic connections that you disconnected. With our cam buckle strap removed and our fascia put back in place, that will do it for our look at and our installation of our Stealth Hitch on our 2026 Mercedes-Benz GLC. I'm Scott with etrailer, and thanks for watching.
Customer Satisfaction Score:
98% were satisfied with this product
2% of customers were not satisfied
Ratings & Reviews

Top notch company and quick service. Hitch showed up exactly as described.
Excellent quality.
Do you have a question about this Trailer Hitch?
Info for this part was:
At etrailer we provide the best information available about the products we sell. We take the quality of our information seriously so that you can get the right part the first time. Let us know if anything is missing or if you have any questions.


















Thank you! Your comment has been submitted successfully. You should be able to view your question/comment here within a few days.
Error submitting comment. Please try again momentarily.